Great writing requires more than a compelling story. You want your text to be articulate and free of mistyped words. Take your writing to the next level with Ulysses’ built-in grammar and style check. It helps you fix grammar, spelling, and punctuation issues and offers recommendations on redundancy, style, and more — in over 20 languages.
You can access Ulysses’ advanced check via the revision mode. This is a dedicated mode whose colors are optimized for the task of revising your text. In addition to the grammar and style check, you can also display annotations and the system’s spelling suggestions here.
The advanced check is an online service. Therefore, an internet connection is required to use it. You will be asked to enable it when you use it for the first time. Later, all you need to do is open the sheet and analyze your text. You’ll have to initiate the text check for each sheet individually.
Our grammar and style check is powered by the proofreading software LanguageTool. Ulysses utilizes only a portion of LanguageTool Premium’s features, specifically the ones for checking grammar, punctuation and style. It is available for almost all of Ulysses’ localized languages: English, Dutch, German, French, Italian, Portuguese, Chinese, Russian, Japanese, and Spanish. Korean is the only language not currently supported.
Furthermore, you can check texts in Catalan, Ukrainian, Irish, Breton, Arabic, Romanian, Esperanto, Galician, Persian, Polish, Tamil, Slovak, Italian, Slovenian, Danish, Asturian, Greek, Tagalog, Khmer, Swedish, and Belarusian.
Your language will be recognized automatically. However, please note that the number of available suggestions differs from language to language.
On Mac
All you need to do is open the sheet you want to analyze, click the Revision icon in the toolbar (1) and select “Check Text…”.
Now, your text will be analyzed, and potential issues will be flagged.
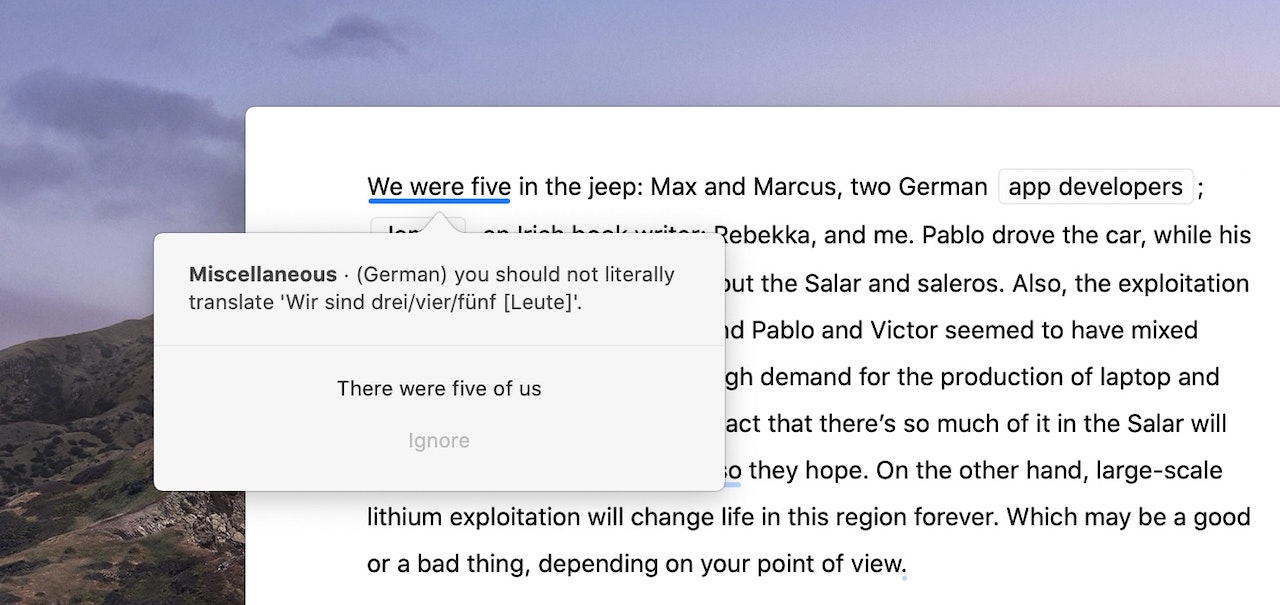
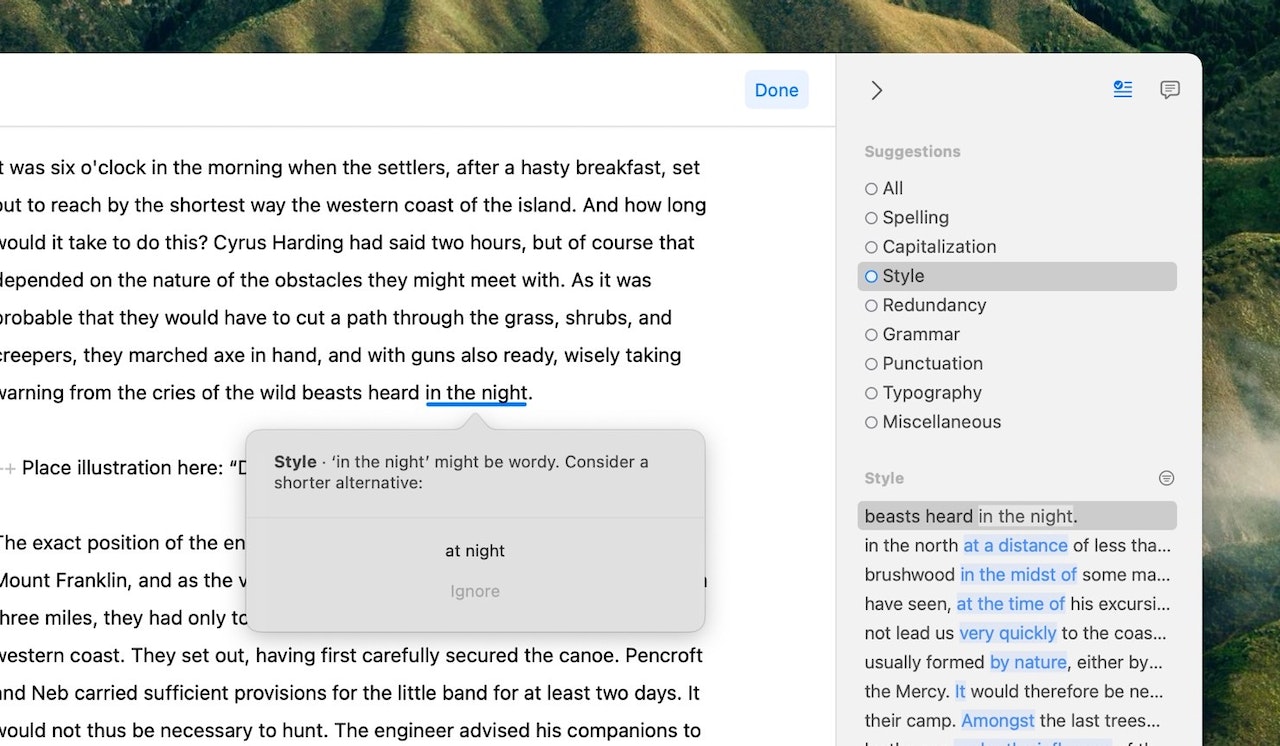
You can conveniently sift through the check’s suggestions via the revision sidebar. One click takes you to the highlighted passage in the editor; a double-click opens the suggestion with detailed information on the issue as well as a recommended alternative and the option to ignore it. If you select the alternative, the text will be replaced automatically.
In the revision pane, you can browse suggestions or select a suggestion category, e.g., Redundancy. If your text contains recurring issues in this category, you can fix them all at once. Simply click on the filter icon next to a category to reveal recurring issues.
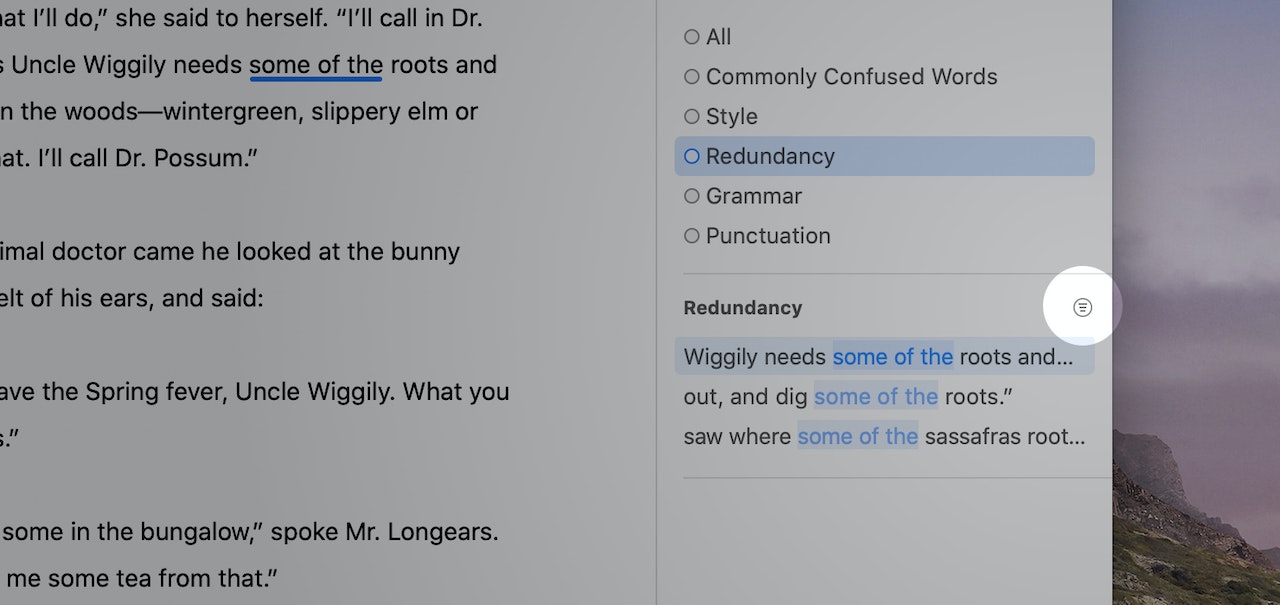
To correct recurring issues of a certain type at once, double-click the suggestion and select the alternative from the popover.
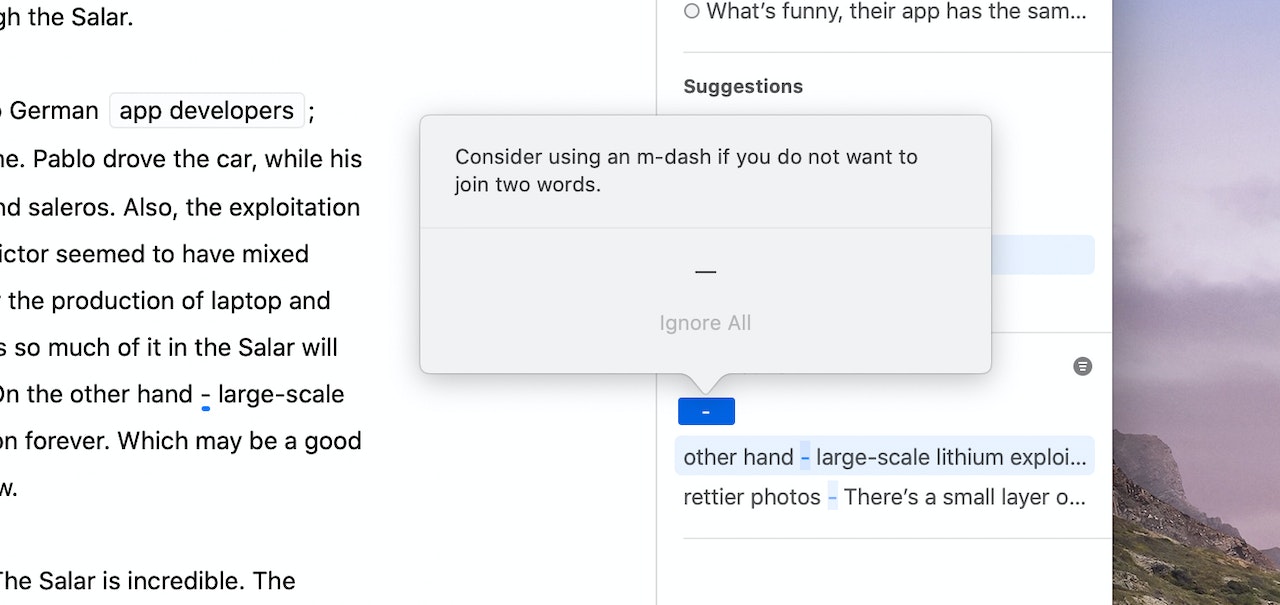
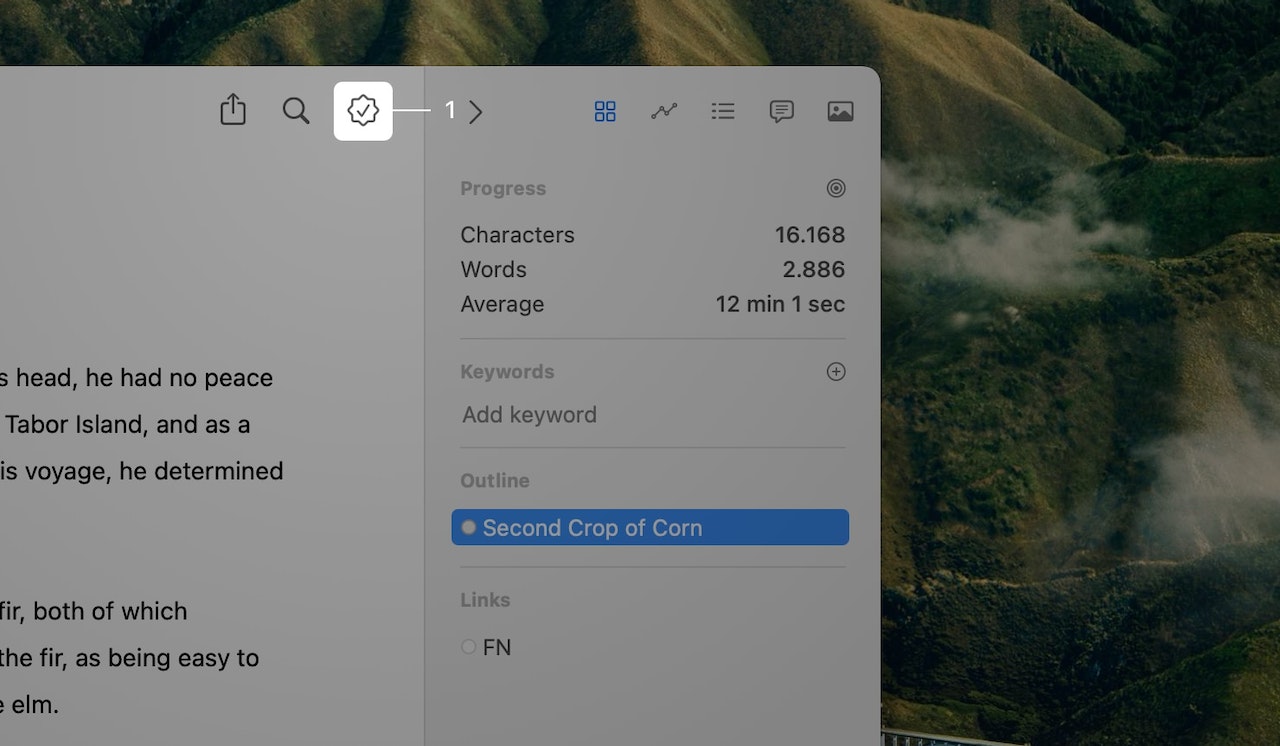
Via the gear icon at the bottom right of the revision pane (1), you can disable suggestion categories you don’t need. Enabling the option “Ignored” allows you to browse the suggestions you’ve ignored before.

From here, you can also set if you want to show annotations and the system’s spelling suggestions in the revision view. To disable your sheet's grammar and style check, uncheck all options in the “Advanced Check” section.
You can quit revision mode by clicking the blue Revision Mode icon in the toolbar.

On iPad
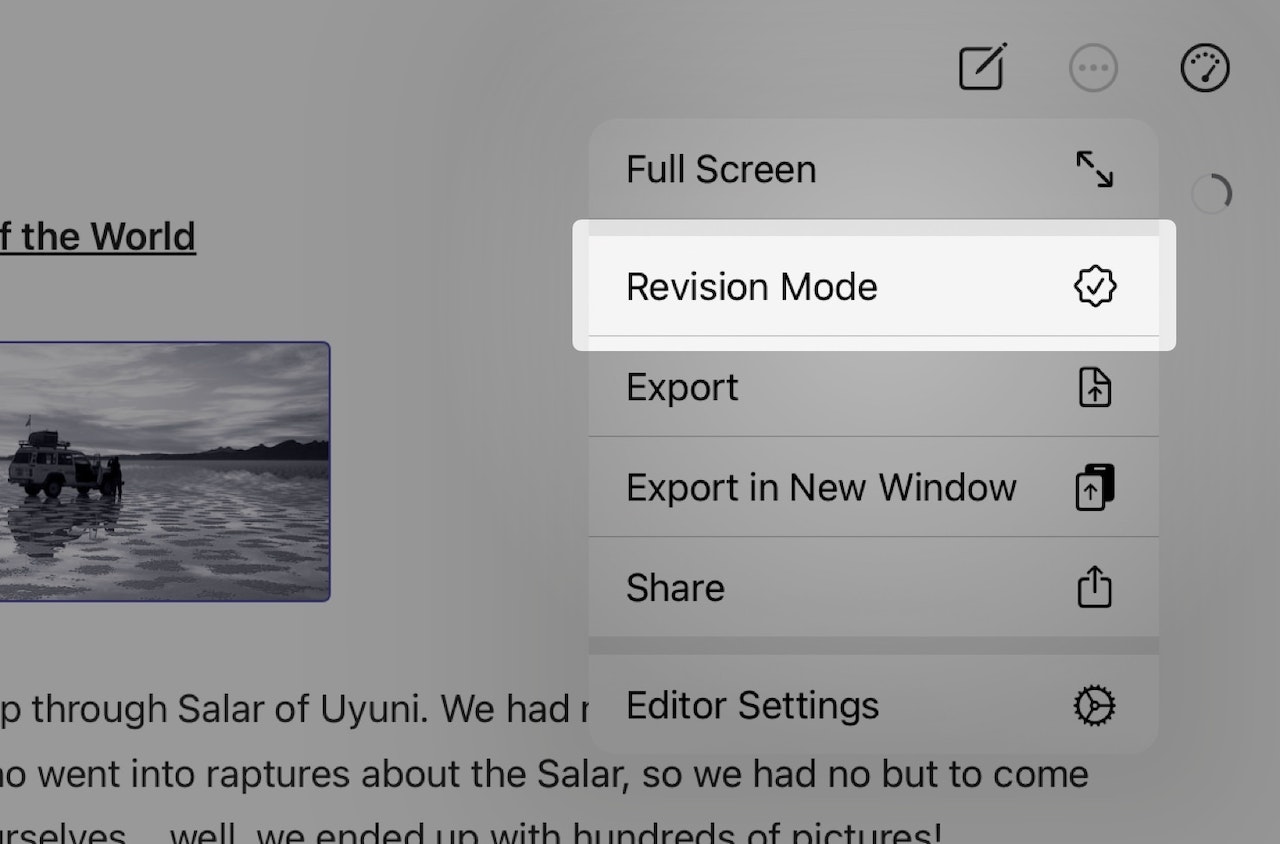
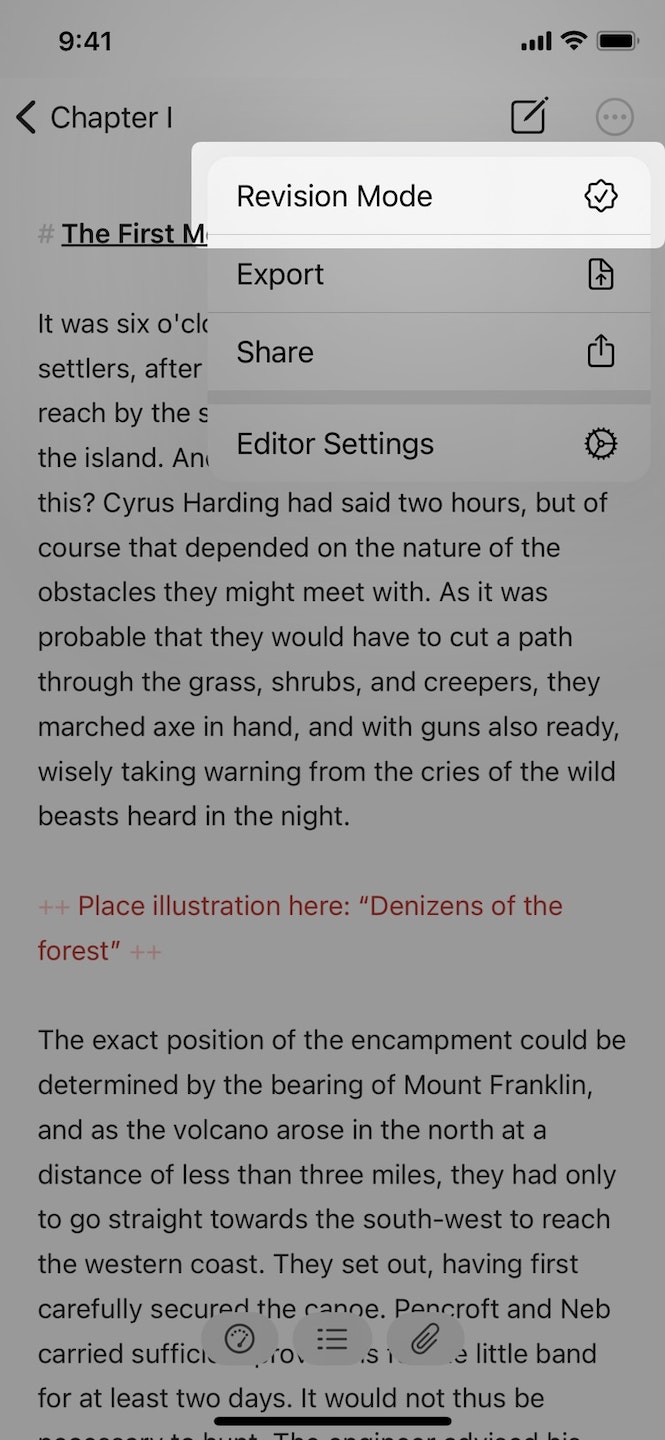
To access Ulysses’ grammar and style check, open the editor menu (circled ellipsis) and enable “Revision Mode.”
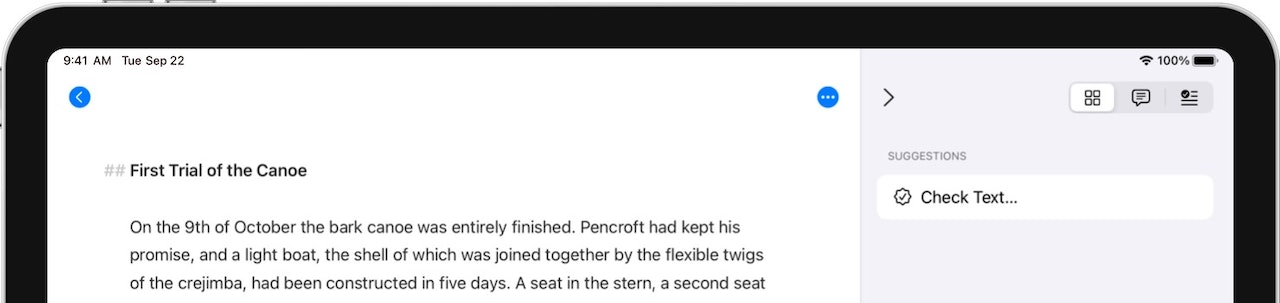
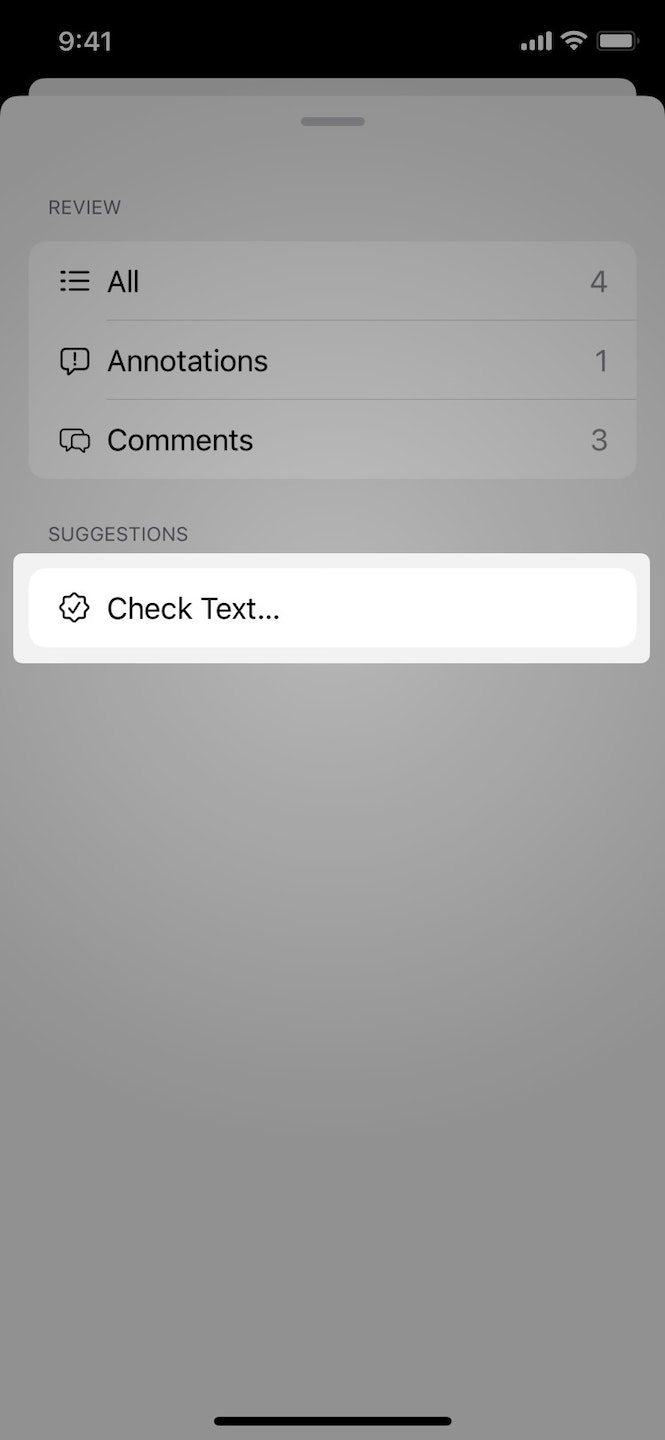
This will open the revision mode’s overview. If you’ve added annotations and comments to your text, they will appear here as well. Now, select “Check Text…” to start analyzing the sheet’s content.
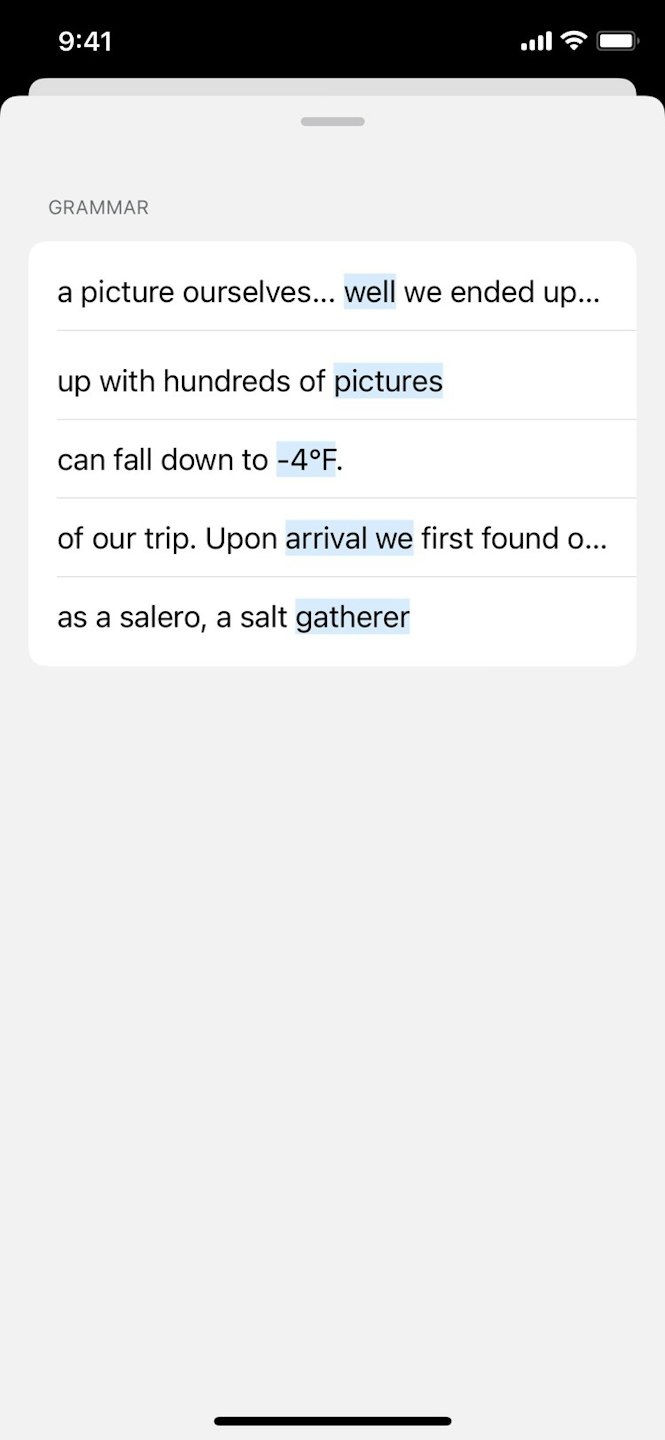
You’ll get a list with suggestions neatly grouped into categories (3).
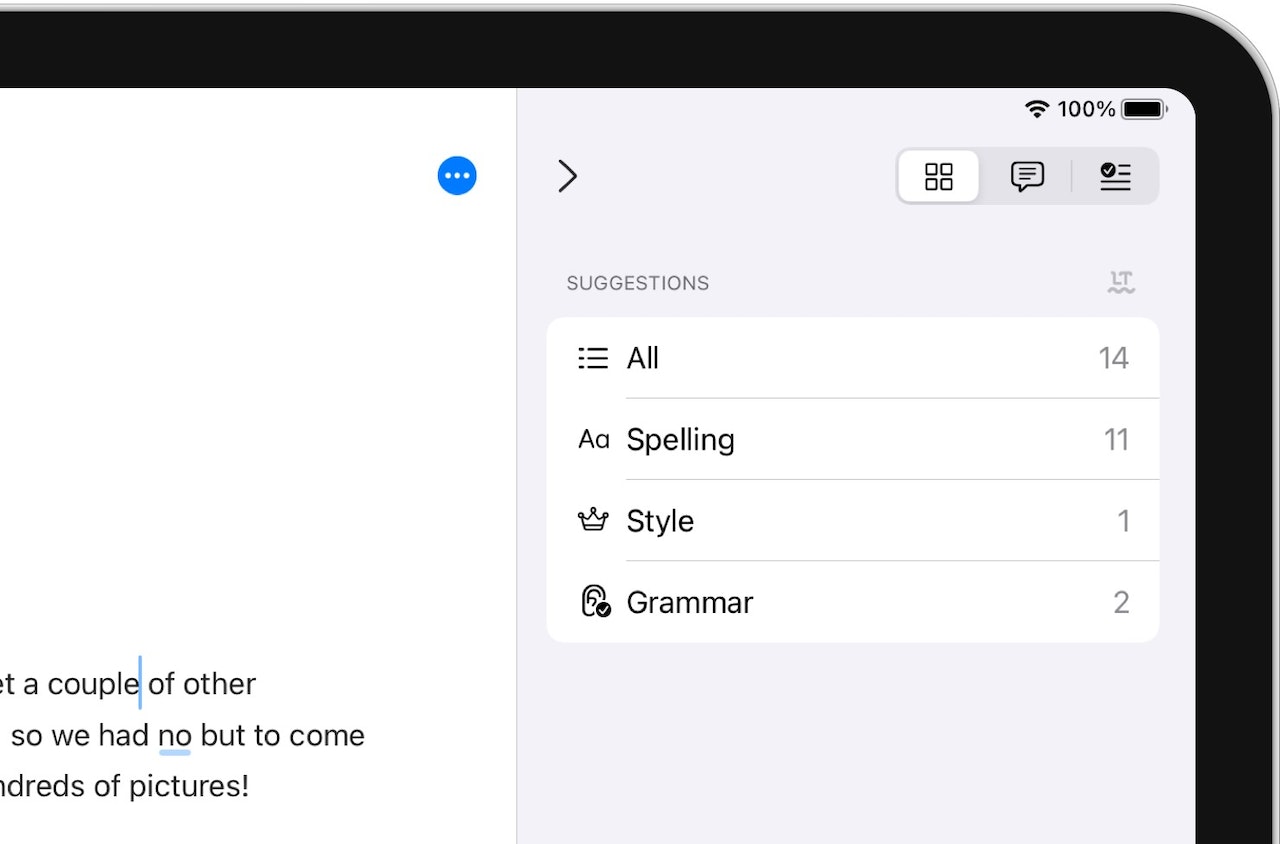
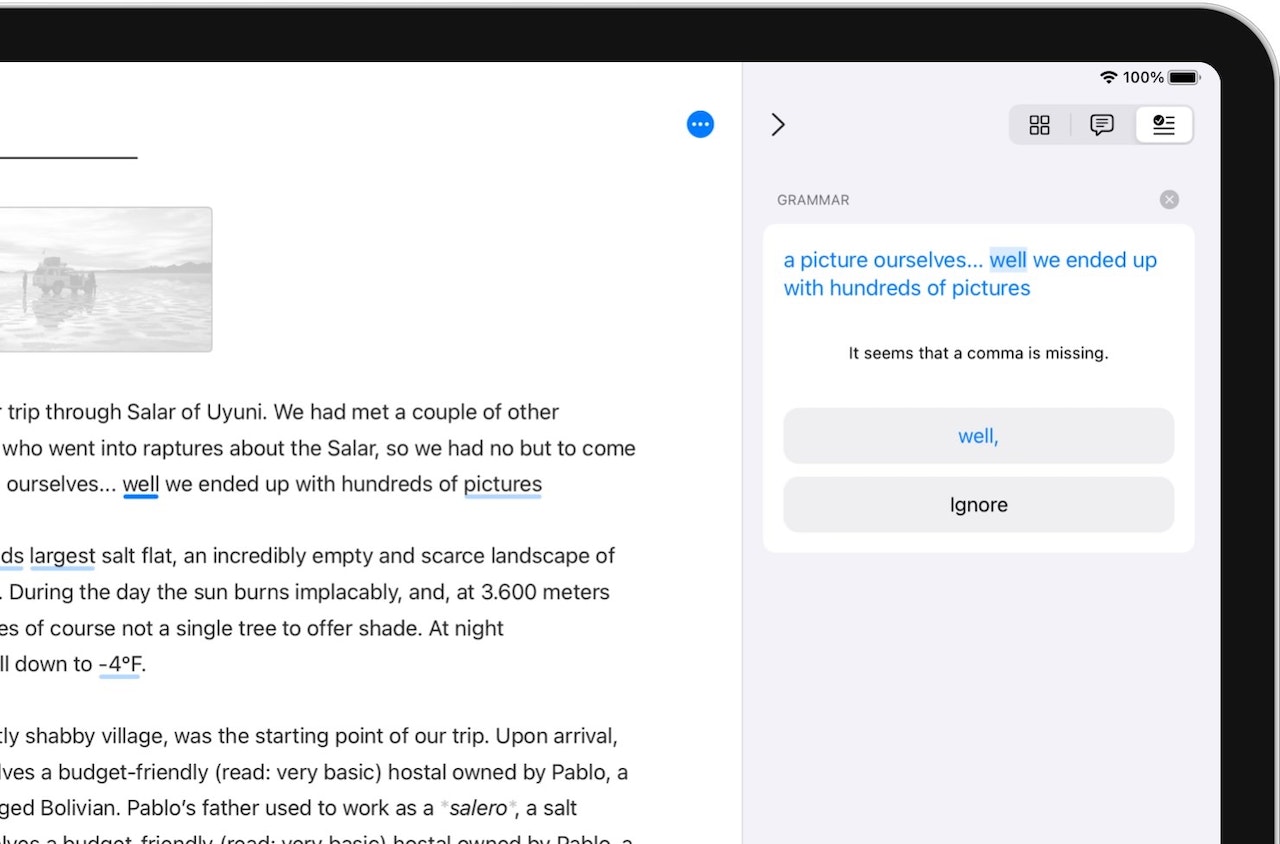
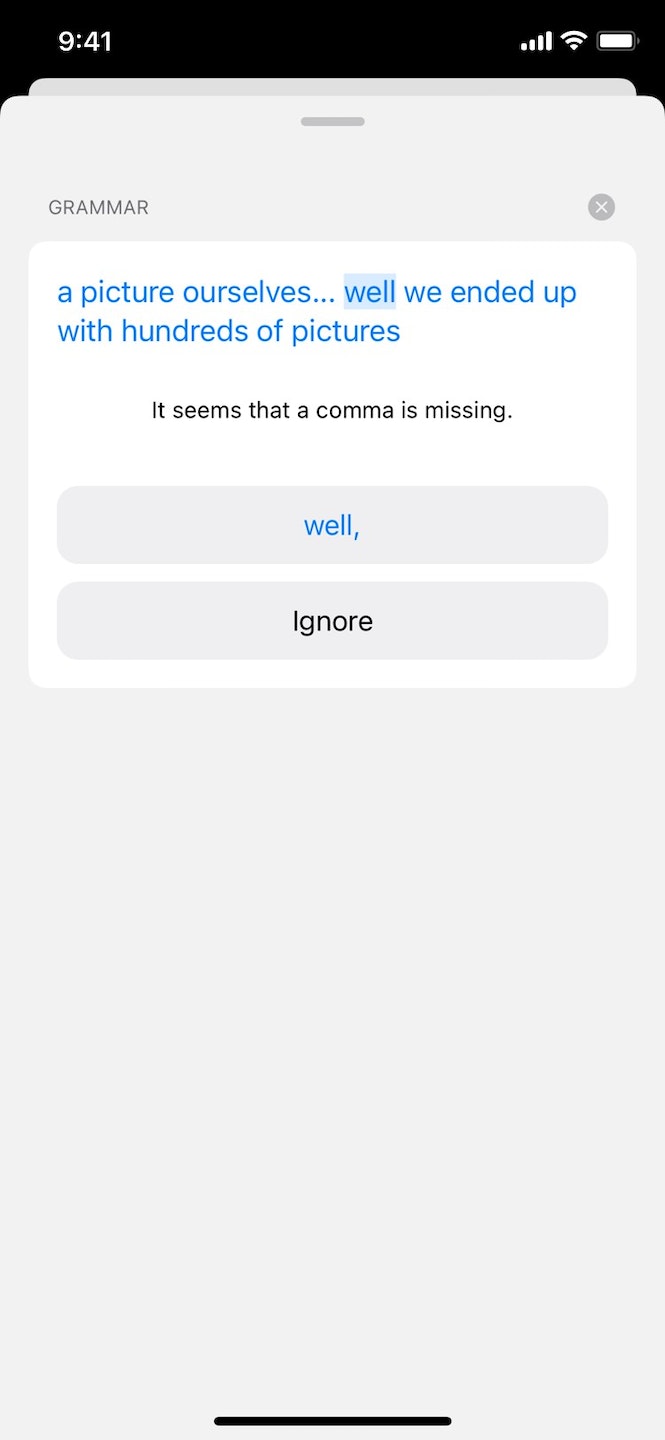
Tapping a category, e.g., Grammar will open a list with all grammar suggestions the text check has found. Select a particular suggestion to get detailed information. Also, the editor will conveniently jump to the flagged passage in the text. Now you can select a recommended alternative or choose to ignore the suggestion.
Close the suggestion (circled x) to go back to the list of suggestions in this category. To head back to the categories overview, tap the four squares button at the top of the revision sidebar.
Note: You can also open a suggestion by tapping on a highlighted passage in the text.
To quit revision mode, open the editor menu (circled ellipsis) and select “End Revision Mode”. If you switch to the sheet list or the library, revision mode will end automatically.
To quit revision mode, open the editor menu (circled ellipsis) and select “End Revision Mode”. If you switch to the sheet list or the library, revision mode will end automatically.
On iPhone
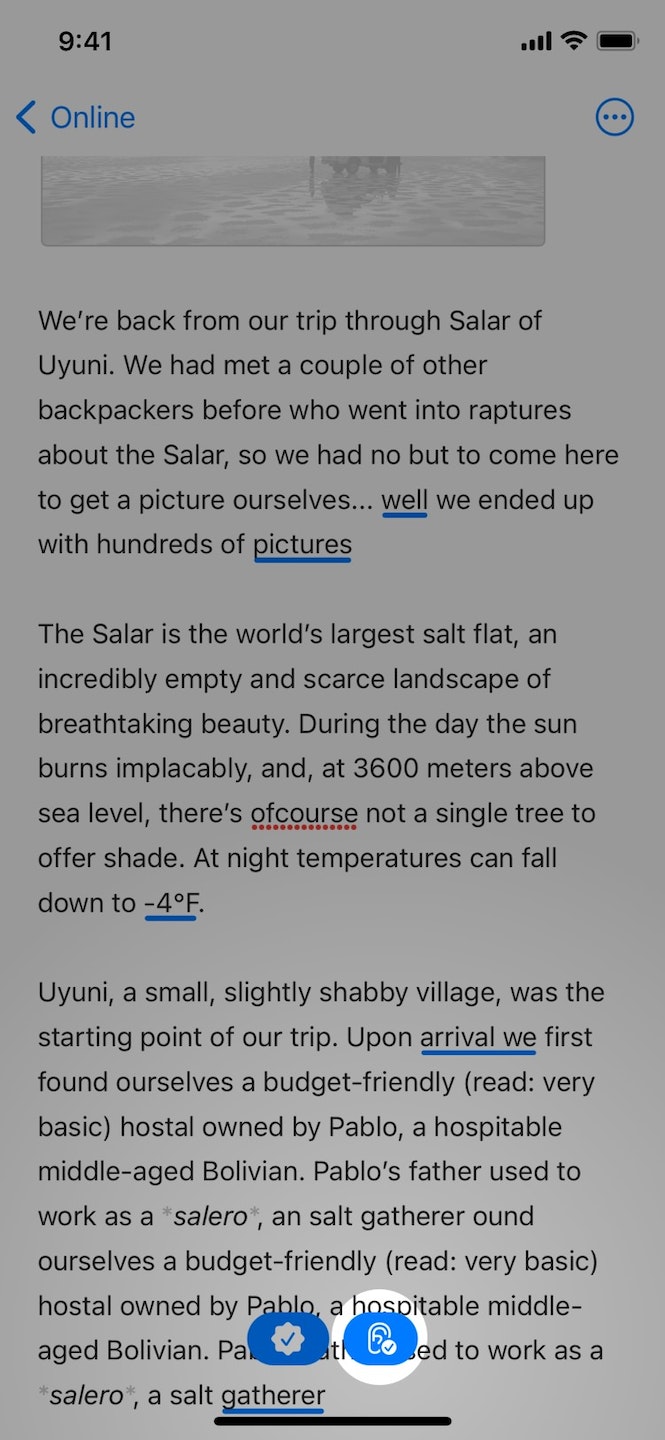
Just as on iPad, open the editor menu (1), select “Revision Mode” (2) and choose “Check Text…” (3) to start analyzing your sheet.
 |
 |
 |
You’ll get a list of categories for which the text check has found potential issues (1). Now, if you select a category, the editor will open, with all text passages highlighted for which the text check has found potential issues in this category (2). Next, tap on a text passage to open the suggestion with more information on the issue (3).
 |
 |
 |
Choosing a recommended alternative, ignoring the suggestion, or closing it (circled x top right) will take you to a list of suggestions in the category you’ve chosen before. Tap on the next suggestion to reveal its details, etc. If you prefer to go back to the editor, close the suggestions overlay by swiping it to the bottom.
To make navigating between the revision overview, suggestion lists and the editor easier, two buttons will appear at the bottom of the editor.
The blue checkmark gives you quick access to the revision overview with the suggestion categories. Next to it, a second button provides quick access to the list of suggestions in the last chosen category.
 |
|
To end the revision mode, open the editor menu (circled ellipsis) and select “End Revision Mode” or open the sheet list.
You can also disable the advanced text check in general: Open the editor menu, select “Editor Settings,” choose “Revision Mode,” and toggle off “Advanced Text Check.”
A Note on Privacy
When you check a text, it will be sent to our servers, from which it is forwarded to LanguageTool for analysis. You have to explicitly trigger text check per sheet, and it will be run only in sheets where you do this, not in your entire library. While the text is being processed, it is kept on our servers and the servers of LanguageTool. It will be deleted from the servers shortly after the text checking has been completed.